
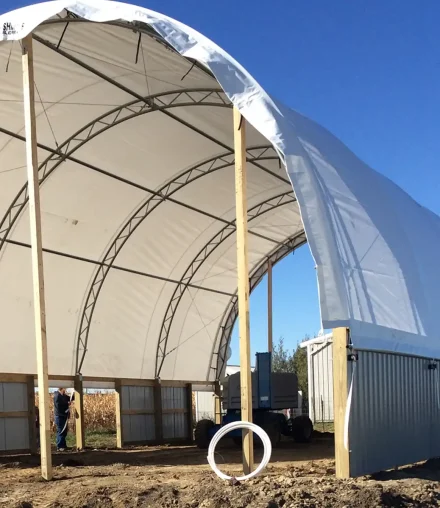
This guide walks you through each step of installing a new or replacement cover on a fabric building. It focuses on ponywall-type buildings, which are our most popular. This is the method we use and recommend to our DIY customers.
If your building has a different style, we can still make a cover that fits perfectly. Some steps in these instructions may be different for you, but the main process for installing a cover is similar for most fabric buildings.
If your building is large or you are unsure about the process or equipment, we strongly suggest hiring professionals to help.
The steps are mostly the same whether you are putting a new cover on a new building from us or replacing a cover on an older hoop barn. The only differences are taking off the old cover if it is still there and checking the frame and hardware to make sure they are in good shape.
If you just want the basics, you can skip ahead to this part.
If you are here looking for more information about our covers, you can find it on our building covers page, and more about the material they’re made from on the hoop fabric page.
This is important if you are replacing your cover due to storm damage. Any frame damage should be repaired before you replace your cover tarp.
We also recommend wrapping duct tape around any areas of your frame that your fabric cover could snag or wear on. Our crews do this on both new buildings and old building cover replacements.
You or your contractor will need free access to the inside of your hoop shed as well as some area outside. Try to provide some working room, particularly if you have a wide cover.
If you are replacing a cover, now is the time to check your hardware for function.
After your hoop building cover was made at the factory, it was accordion-folded and then rolled perfectly for easy delivery. They wrap it in scrap fabric and strap the new cover to a pallet.
Your actual cover tarp comes wrapped in an extra protective sheet of fabric to make sure it arrives in new condition. If it appears that there was damage that may have penetrated the outer cover, please report it on the freight documents.
There has never been any damage to a building tarp we received, but we still take a peek inside the wrapper if its rolling direction is not marked on the outside. Once we know the direction to unroll it, we place it at the proper corner of the hoop shed, unrolling it alongside the building on the side we decided to pull FROM.
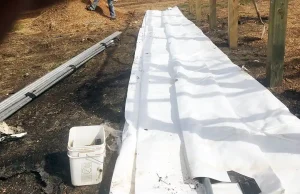 Which side of a fabric barn you roll the cover out on can depend on a few factors:
Once we’ve rolled out the cover as flat and level as we can, there will be a pipe pocket right on top, close to the building. We slide the swedged tie-down pipe into this pocket one at a time, screwing them together as we go. After we’ve installed that tie-down pipe, we carefully fold that fabric section back and every layer underneath it until we reach the other pipe pocket, which will be at the very bottom.
The second tie-down pipe is installed the same way as the first. After installation, we loosely attach the tie-down ratchet straps to the pipe and to the ratchets on the building, so there is no need to worry about that side of the cover getting away from the building during installation. After the second tie-down pipe is installed and loosely secured, we refold all the fabric layers, leaving the first pipe once again on top of the pile.
You are now ready to throw your pulling ropes over your building. Note: you can do this part anytime you’ve got someone with a good throwing arm handy. We tie a hitch pin to the end of the rope to carry it over, and it can still be difficult with a large building. We also prefer a nice, thick rope you can get a grip on rather than a skinny nylon rope that cuts into your hand, but if you’re only going to do this once every 20-25 years, you needn’t be fussy.
The number of ropes you use is largely dependent on how many people you have to help pull the cover over. The more, the merrier! A bare minimum on the smallest building would be 3. On a longer building, we use every 15′ unless the building is wide. The wider the building, the heavier the cover tarps are and the more pullers or mechanical means are required.
After our ropes are over, we tie them securely to the tie-down pipe on top of the cover accordion pile, and all that’s left to do is pull the cover up and over. (Ha, ha! That’s an inside joke. There is a little work left to be done yet!)
This part is pretty straightforward. Almost every fabric building dealer recommends manually pulling your replacement hoop cover over. So do we when the cover is small enough and you have enough friends for this to be possible.
We like to have at least one person inside the hoop shed when we’re pulling. We prefer them in a lift so they can see what’s going on and ensure the cover goes on smoothly.
When the cover is all the way over, we secure the ratchet straps on the second side loosely until we make sure the cover is perfectly centered both side-to-side and at the ends. Always make sure the cover is secured in case of a sudden gust of wind.
We usually use PVC (typically 1″ belled electrical conduit) in a pocket for end-to-end tensioning. We leave the “pushing from” corner of the cover loose until we get the PVC installed.
We do the PVC one piece at a time, cleaning and gluing as we go. This really is a two-person job. Having someone on the outside push it and someone on the inside guide it works best. If needed, we cut the PVC to length.
When the ends are centered and secured with ratchets or another method, the side ratchets are tightened down securely. Wait a day or two and do the sides again. You should repeat checking the side ratchets about every 6 months. Keep them nice and snug to extend the life of your shed tarp.
If you have any questions about this process, please ask. We’re here to help.